|
I wanted to demonstrate how effectively shellac performs as a sizing medium for painting oils on paper. The shellac mixture below was made about half a day before the demonstration was started. 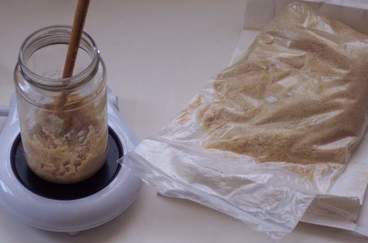 This is de-waxed pale “blonde” shellac in the bag. I ground it down into a powder to help accelerate the dissolving process. I tend to make my shellac in a rather unorthodox manner than what is normally recommended by first making a “soap” using dissolved borax. That is how shellac based ink is made. It’s approximately 1 teaspoon borax, 8 tsp water, and 5 tsp shellac. I can’t tell you the exact amount since I tend to do it by sight these days instead of careful measure. I place this in a jar and set it on a coffee warmer while stirring for a few minutes until all the water is gone and I’m left with a paste that looks like light brown sugar (see below.) 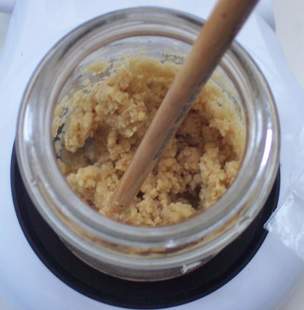 Shellac Soap Next I mix in grain alcohol. Most recommended mixtures just start with dry shellac and alcohol and avoid borax, which is perfectly fine. I just found that it takes longer that way and doesn’t give a better result. The alcohol I use is the Everclear brand which is 190 proof. Denatured alcohol would work fine, but also takes longer. Keeping the jar on the warmer, I occasionally stir the contents and after about 2 or 3 hours I get something that looks like creamed coffee. The amount of alcohol is again not precisely measured but roughly about the same as the “soap” volume I started with. It amounts to what is referred to as about a 3 pound cut of shellac to alcohol. I’ve also used a 2 pound cut, but I would want to add a primer layer to that. Acrylic primers adhere fine to shellac but I wouldn’t recommend thinning them with water. 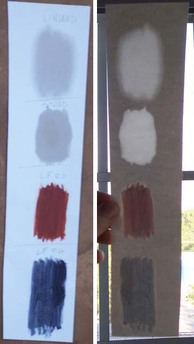 In the image above, on the left you can see the linseed oil and stand oil on a piece of the same paper that has no sizing protection, as well as a couple oil paints from Le Franc, red ochre and Paynes grey, which I believe use safflower oil. The oils started to soak into the untreated paper immediately, and when you look through the back (right image) you can see how the oils make the paper nearly translucent. As these oils dry they will release acid that will discolor the paper and likely make it brittle over time. Shellac prevents that. 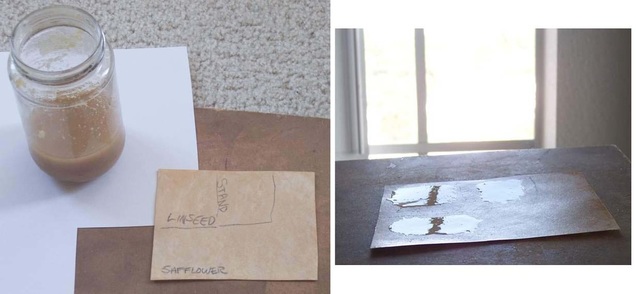 The paper used above is thin bristol, about 90-100 pound weight. I’m using a thin paper so that any oil that penetrates through the shellac would be easy to see. I placed two coats of shellac on both sides of the sample paper and let that dry for about an hour. Next I placed three oil medium swatches of refined linseed oil, stand oil, and safflower that I had handy. All of these were made about 5 days ago. In the image below (looking at the paper from the back) you see how the shellac has held up after that period of time and the oils have dried. None of the oil has penetrated through to the back side of the shellac treated paper.  CONCLUSION:
Shellac is excellent sizing protection for oils and paper as well as wood. I prefer it to other choices. It does take some time to prepare, but it doesn’t require the use of water that acrylic mediums or animal glues would need, so there’s no worry about wrinkled paper. Rabbit skin glue has to be made at least a day in advance, whereas this sheet was ready for painting from start to finish in about half a day. An acrylic medium would be faster to apply, but the paper has to dry completely, requires taping down the paper, and I just don’t like the feel of oil paint on acrylic. A batch of fresh shellac will last at least six months or more. I keep it in the fridge until needed.
1 Comment
Many years ago I learned how to make my own gouache paint, since all the commercial brands I could find at that time were in small tubes that I used up rather quickly. Raw pigment was a bit more difficult to find back then. Anyway, here’s a sample batch I made recently of some burnt umber gouache. 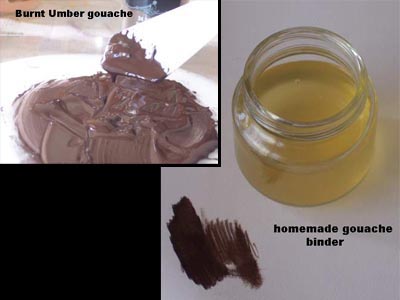 The mixture below will make about 1 ounce of gouache paint. BINDER:
1-2 drops preservative: Oil of clove, Thymol, or even unscented Lysol will work.Not required, but will help prolong the life of the mixture. 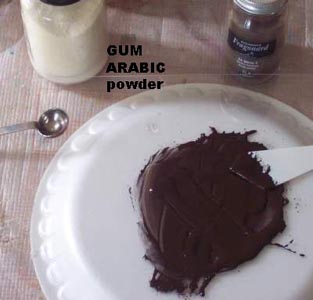 PAINT:
Make an indentation in the pigment pile. Add a small amount of binder solution and mix together thoroughly. A good target is half as much binder as pigment (1:2) but some pigments require less. Keep adding just enough binder to make a smooth paint to your liking. If it gets too wet, add more pigment. Any pigment that is difficult to get wet can be helped along with a teaspoon of grain alcohol. Keep scraping the paint back into a pile to keep it all wet so it won't dry on you. 20 to 30 minutes is the most mixing time you should need, often less. 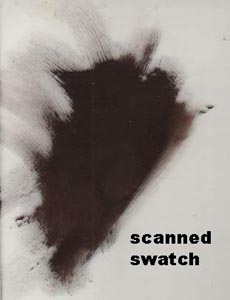 TESTING:
Using the palette knife, lay down a small swatch of fresh paint on a clean spot of the mixing plate in a layer that has thick and thin spots. Let that air dry for several minutes COMPLETELY (this may take longer than you think – give it 20-30 minutes or so.) Rub the dried paint with a cloth. If it feels gritty, you need to do more mixing. If paint lifts off completely then there’s not enough binder. If it just slightly stains the cloth that should be fine. If the dried paint has cracks then there’s too much binder. Those can be hairline cracks, so I like to make a high-res computer scan of the dried paint to be certain.It's useful to do the same test with a high quality commercial paint to make an accurate comparison. SAFETY FIRST! Please remember that pigments have certain health hazards and require careful handling in powder form. Don't be messy and wash everything thoroughly. A respirator and laytex gloves can be used as an extra precaution. NOTES: Dry pigments clump together and need to be broken down and coated with binder to make a proper paint. That is usually referred to as "grinding" but I believe mulling is a better term - it's more like rubbing.You can't over do it, but you can under do it. Some pigments can be grittier than others, which will take longer to mix. Usually a flat metal palette knife or spatula is all I need. If the pigment is very gritty, I'll move up to a mortar and pestle. I have a glass muller but find it's rarely necessary unless I'm making large amounts of paint or want it extra smooth for thin washes. A rough frosted glass pane is best as a work surface. There are pigments on the market sold as water dispersions. These are pigments mixed with water and small amounts of other things to keep them wet. The benefit of these is that the liquid keeps the pigments from clumping together so no grinding is necessary. You need to account for that water in your mixture, however, so that the paint isn't too thin. They're often more expensive than dry powders also. Supplies can be found at various stores that cater to pigment supplies, including grinding slabs, mortars, mullers, etc. Oxgall is often found in the watercolor section of art stores. Glycerin is used in candlemaking, gum arabic in cake decoration. Dextrin is used in brewing beer, or making fireworks. You can make yellow dextrin by roasting corn starch for 10 minutes in a 400° oven. Shop around, but make sure you buy pure ingredients.Some Pigment Suppliers: Kama Pigments Sinopia Guerra Natural Pigments Zecchi Conclusion: If you find yourself using up those tiny tubes of paint, making your own can be much more economical, especially for expensive or hard to find colors. You also have more control over paint quality. Gouache is one of the simplest paints you can make, short of egg tempera. The only issue is finding all the ingredients, but it's all available online. This pre-mixed binder can keep for several years, as will the paint. If it dries out, it rewets easily. |
 RSS Feed
