Making Casein Gesso
Updated Oct.5.2017
I've adapted various recipes for making traditional gesso by substituting casein emulsion for rabbit skin glue. This is recommended to only be used on firm supports such as wood panels. It's a bit easier to manage than rabbit skin glue, in my opinion, since it doesn't require constant heating, and can last for months rather than just a few days. I've used this surface for oil, gouache and casein paint, but oil paint needs the most coats and tempering. It's also a wonderful drawing surface for pencil and ink. The whole process takes about 4-5 days, not including final drying time, so doing several panels at once is a good idea.
You will need:
Casein binder (see "Articles" section)
White pigment (titanium, or titanium and zinc)
Whiting (calcium carbonate, chalk, marble dust, gypsum, or a combination of these)
Denatured alcohol
Distilled water
Cheesecloth for straining gesso
Sandpaper #300 and #2000 grit
Alum (aluminum sulfate - optional)
Blond dewaxed Shellac (optional for tempering)
Wood stirring spoon/sticks & spatula for mixing pigment
Several bowls for mixing
Measuring cups and spoons
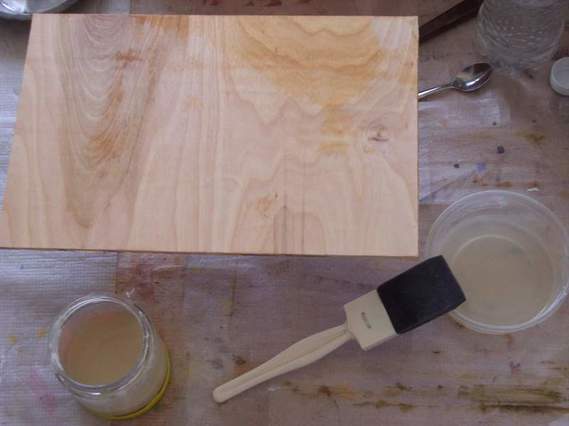
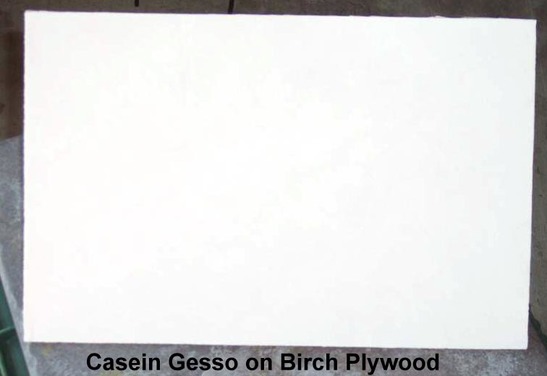
The picture above shows a small birch plywood panel 1/8 inch thick. The glass jar at bottom left contains some casein binder, and the cup on the right holds the diluted binder that will be used to size the panel. Sizing helps reduce the absorbancy of the wood, and makes the initial coats of the gesso easier to apply. Alternatively, you can use a couple coats of 2-pound dewaxed clear shellac, or an appropriate acrylic sizing medium, such as Golden's GAC100.
Making the Casein Size:
Dilute the binder gel to a sizing liquid by a ratio of 1:10 (10 times more water) by volume*. One tablespoon as a unit makes about 1/2 cup or so. This should be plenty for up to 2x2 ft. with two coats. It dissolves well if you set the container inside a larger bowl of hot (not boiling) water and stir gradually until it's all diluted. Microwaving the water beforehand for a few seconds will also work. Apply two coats on all sides of the panel, including the edges, and let it dry well for 2-3 days before adding gesso.
ContinueMaking the Gesso:
This recipe will make @ 1-2 cups of gesso.
In an 8 ounce jar, microwave 14 tablespoons of distilled water (1/2 cup or 200ml) for @ 20 seconds, or heat it to @ 90-100 degrees.
Add 2 tablespoons of casein gel, stir until it breaks apart, cover the jar with a lid and shake vigorously for a couple minutes until all the gel dissolves. Let the foam disappear before continuing.
Add 1 teaspoon glycerin or honey and stir. This will help make the gesso spread more easily and reduce causing air bubbles.
Mix 3/4 cup of solids: 10% pigment, 90% whiting (calcium carbonate, gypsum, and/or marble dust)
The easiest way to get the percentage is to use 1 ounce pigment to 9 ounces whiting. This results in about 1 cup of solids, so just take your 3/4 cups from that, and use the remainder for making another batch of gesso later.
Note that pigment is not required, but titanium white will make a brighter color than whiting alone. It can be any color you wish. Use a respirator when mixing the dry powders as they can be caustic to breathe in. Shaking them in a covered jar helps avoid getting them airborne.
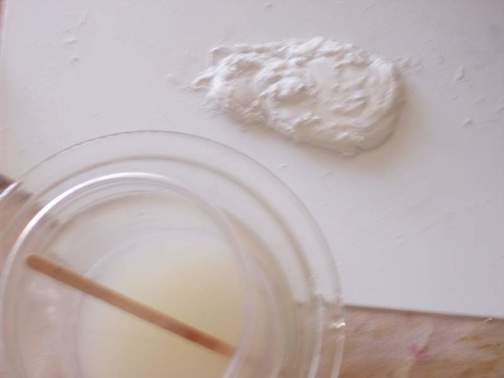
Place the solids in a large mixing bowl. Add @1/3 of the casein liquid, and fold in the solids until it starts to ball up like putty or bread dough, but not get too liquid. You may need to add a teaspoon of alcohol or ox gall to get the pigment to mix better, since some pigments repel water. Cover the bowl to keep dust out, and let it sit for an hour or more.
Add the remaining 2/3 casein liquid to a large bowl. Add a small handful of the whiting putty , and gently mash it into the liquid. Continue doing this until all the putty is used up. Stir it until smooth and evenly blended.
Cover a large jar with cheesecloth, and strain your gesso mixture. Pour this into a large bowl, cover it to keep out dust, and let it sit for 6-8 hours, or overnight. I prefer using a large metal bowl with a rounded lip. but here I'm just using a small cup.
This recipe will make @ 1-2 cups of gesso.
In an 8 ounce jar, microwave 14 tablespoons of distilled water (1/2 cup or 200ml) for @ 20 seconds, or heat it to @ 90-100 degrees.
Add 2 tablespoons of casein gel, stir until it breaks apart, cover the jar with a lid and shake vigorously for a couple minutes until all the gel dissolves. Let the foam disappear before continuing.
Add 1 teaspoon glycerin or honey and stir. This will help make the gesso spread more easily and reduce causing air bubbles.
Mix 3/4 cup of solids: 10% pigment, 90% whiting (calcium carbonate, gypsum, and/or marble dust)
The easiest way to get the percentage is to use 1 ounce pigment to 9 ounces whiting. This results in about 1 cup of solids, so just take your 3/4 cups from that, and use the remainder for making another batch of gesso later.
Note that pigment is not required, but titanium white will make a brighter color than whiting alone. It can be any color you wish. Use a respirator when mixing the dry powders as they can be caustic to breathe in. Shaking them in a covered jar helps avoid getting them airborne.
Place the solids in a large mixing bowl. Add @1/3 of the casein liquid, and fold in the solids until it starts to ball up like putty or bread dough, but not get too liquid. You may need to add a teaspoon of alcohol or ox gall to get the pigment to mix better, since some pigments repel water. Cover the bowl to keep dust out, and let it sit for an hour or more.
Add the remaining 2/3 casein liquid to a large bowl. Add a small handful of the whiting putty , and gently mash it into the liquid. Continue doing this until all the putty is used up. Stir it until smooth and evenly blended.
Cover a large jar with cheesecloth, and strain your gesso mixture. Pour this into a large bowl, cover it to keep out dust, and let it sit for 6-8 hours, or overnight. I prefer using a large metal bowl with a rounded lip. but here I'm just using a small cup.
Applying the Gesso to the Panel:
1-2 cups of gesso will cover about a 2 foot square panel with about 6-8 coats. The idea is to layer multiple thin coats rather than fewer thick coats to avoid it cracking when it dries.
Gently stir your bowl of gesso with a brush by slowly rotating it around the bowl. Be careful not to lift the brush out while stirring, or that can introduce air bubbles. A 2 inch watercolor brush works well. Foam brushes are okay, but may leave bits of foam behind.
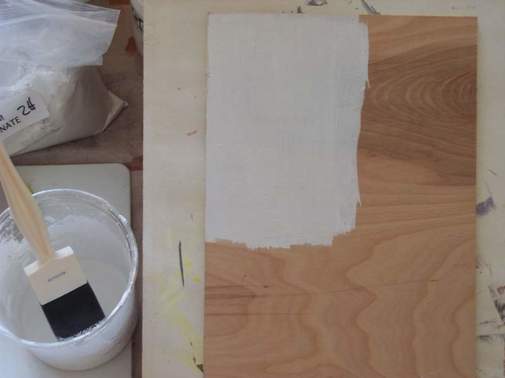
Apply the first coat by dabbing the gesso on the surface a few inches apart, and them brushing them together until smooth, working the gesso into the surface as you go in roughly 6 inch square areas. When you get the whole surface covered, slowly drag a dry brush lightly across the surface to get it smooth and remove excess gesso.
As soon as the wet shine of the water disappears, apply another coat. Brush in one direction (left to right or up and down.) Don't try and accelerate the drying with a fan or heat, since that may cause the glue to crackle. It should air dry in about 10 minutes or so. When this coat dries, apply another by brushing in a perpendicular direction to the previous coat. Continue this process until you get at least 5 to 6 coats. How many will depend on how opaque you want the surface to be, how dark is the wood grain, or if you are painting in oils, more coats can keep the paint away from the panel surface.
If you get any hairs or "debris" on the surface as you paint it, remove it when it's still wet, or wait to sand it out later. Try to avoid this as the panel is drying between coats.
If your panel is thin, I recommend painting this gesso on the back as well, to even out the stress and prevent bowing. You may need more gesso for this, depending on the panel size.
After the panel is touch-dry for an hour or so, place it under some heavy weight to keep it flat as it continues to dry for another day or more. If your going to paint the surface with oils, wait at least a week for all the water to completely evaporate.
With coats this thin and using glycerin, you shouldn't see brush marks very prominently. If you do, you can "sand" with a small wood block that has a damp face and rounded edges. Slowly circle the surface with this wet face until the brush marks disappear, let that dry, sand with a fine grit sandpaper. Brush off the dust, wet a lint free rag with alcohol, and clean off any remaining dust.
For storage of any remaining gesso, a glass container with a lid works well, and plastic wrap inside the lid helps keep out bacteria. The casein gesso mixture keeps well in refrigeration for 4 to 6 months. The older it gets, the weaker the glue becomes, and that can cause surface problems. After removing it from refrigeration, let it slowly warm up to room temperature before applying.
Tempering with Shellac:
Tempering the gesso makes the surface less absorbent, plus it keeps the gesso from lifting off with the first layer of paint. You can temper with a single thin layer of 2 pound bleached dewaxed shellac. Wait for the final gesso coat to cure for one week before you temper it. The shellac layer should dry for at least an hour before you start painting.
Footnotes:
· This ratio of 1:10 varies for RSG sizing recipes I've found, sometimes as high as 1:14. Strong glue can cause small cracks to appear later, so if you see that happening, use a more diluted mixture next time.
·· Remember, when handling pigment to use care not to breathe it in, and don't wash your hands or tools in the kitchen. Titanium white and whiting are rather inert, but can cause irritation to some people. The powder easily dusts off everywhere, so use a dust mask, goggles and gloves if necessary.
1-2 cups of gesso will cover about a 2 foot square panel with about 6-8 coats. The idea is to layer multiple thin coats rather than fewer thick coats to avoid it cracking when it dries.
Gently stir your bowl of gesso with a brush by slowly rotating it around the bowl. Be careful not to lift the brush out while stirring, or that can introduce air bubbles. A 2 inch watercolor brush works well. Foam brushes are okay, but may leave bits of foam behind.
Apply the first coat by dabbing the gesso on the surface a few inches apart, and them brushing them together until smooth, working the gesso into the surface as you go in roughly 6 inch square areas. When you get the whole surface covered, slowly drag a dry brush lightly across the surface to get it smooth and remove excess gesso.
As soon as the wet shine of the water disappears, apply another coat. Brush in one direction (left to right or up and down.) Don't try and accelerate the drying with a fan or heat, since that may cause the glue to crackle. It should air dry in about 10 minutes or so. When this coat dries, apply another by brushing in a perpendicular direction to the previous coat. Continue this process until you get at least 5 to 6 coats. How many will depend on how opaque you want the surface to be, how dark is the wood grain, or if you are painting in oils, more coats can keep the paint away from the panel surface.
If you get any hairs or "debris" on the surface as you paint it, remove it when it's still wet, or wait to sand it out later. Try to avoid this as the panel is drying between coats.
If your panel is thin, I recommend painting this gesso on the back as well, to even out the stress and prevent bowing. You may need more gesso for this, depending on the panel size.
After the panel is touch-dry for an hour or so, place it under some heavy weight to keep it flat as it continues to dry for another day or more. If your going to paint the surface with oils, wait at least a week for all the water to completely evaporate.
With coats this thin and using glycerin, you shouldn't see brush marks very prominently. If you do, you can "sand" with a small wood block that has a damp face and rounded edges. Slowly circle the surface with this wet face until the brush marks disappear, let that dry, sand with a fine grit sandpaper. Brush off the dust, wet a lint free rag with alcohol, and clean off any remaining dust.
For storage of any remaining gesso, a glass container with a lid works well, and plastic wrap inside the lid helps keep out bacteria. The casein gesso mixture keeps well in refrigeration for 4 to 6 months. The older it gets, the weaker the glue becomes, and that can cause surface problems. After removing it from refrigeration, let it slowly warm up to room temperature before applying.
Tempering with Shellac:
Tempering the gesso makes the surface less absorbent, plus it keeps the gesso from lifting off with the first layer of paint. You can temper with a single thin layer of 2 pound bleached dewaxed shellac. Wait for the final gesso coat to cure for one week before you temper it. The shellac layer should dry for at least an hour before you start painting.
Footnotes:
· This ratio of 1:10 varies for RSG sizing recipes I've found, sometimes as high as 1:14. Strong glue can cause small cracks to appear later, so if you see that happening, use a more diluted mixture next time.
·· Remember, when handling pigment to use care not to breathe it in, and don't wash your hands or tools in the kitchen. Titanium white and whiting are rather inert, but can cause irritation to some people. The powder easily dusts off everywhere, so use a dust mask, goggles and gloves if necessary.
